• Home
  • Blog
  • About

Fresh From Oregon

Experience the Fresh Taste of Oregon...

  • award winning recipes
  • baking
    • bread
  • breakfast
  • canning
  • cast iron cooking
  • desserts
    • cake
    • candy
    • chocolate
    • cookies
    • pies
  • family favorites
  • fresh from oregon
    • farmers market
    • favorite products
    • hazelnuts
    • oregon made
    • pacific northwest trips
  • fruit
    • apples
    • berries
    • peaches
    • pears
  • holidays
    • easter
    • thanksgiving
  • lunch
  • main dishes
    • beef
    • chicken
    • pork
    • seafood
    • soup
    • turkey
  • side dish
    • pasta
    • salad
    • snack
  • vegetables
    • potatoes
    • tomatoes

Pumpkin Roll

November 25, 2014 · by Carrie Trax ·

Pumpkin Roll with Cream Cheese Filling
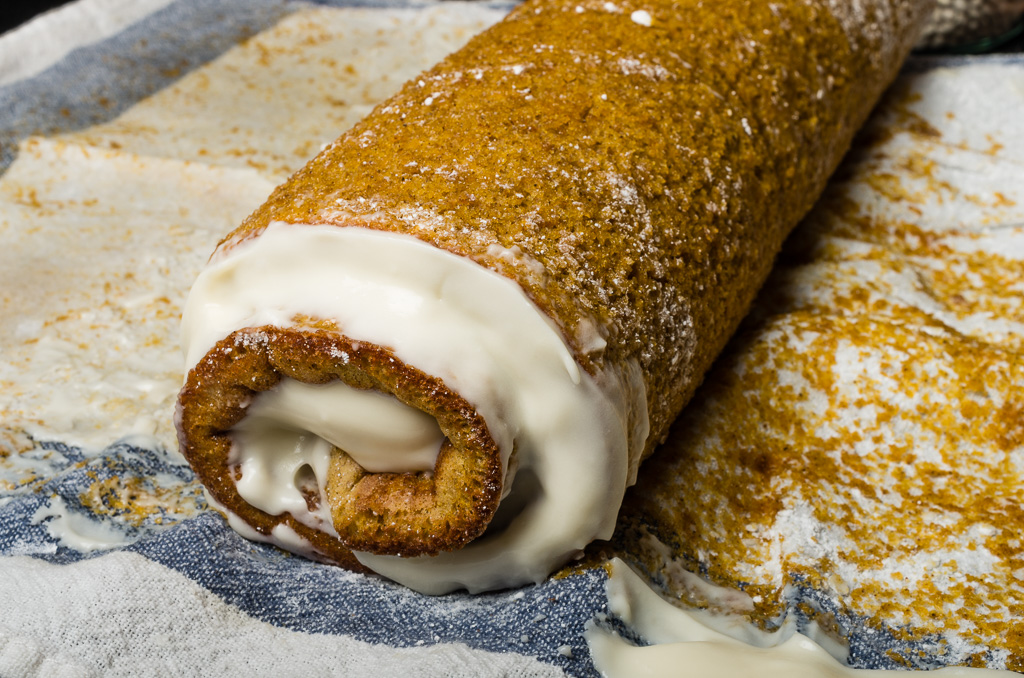
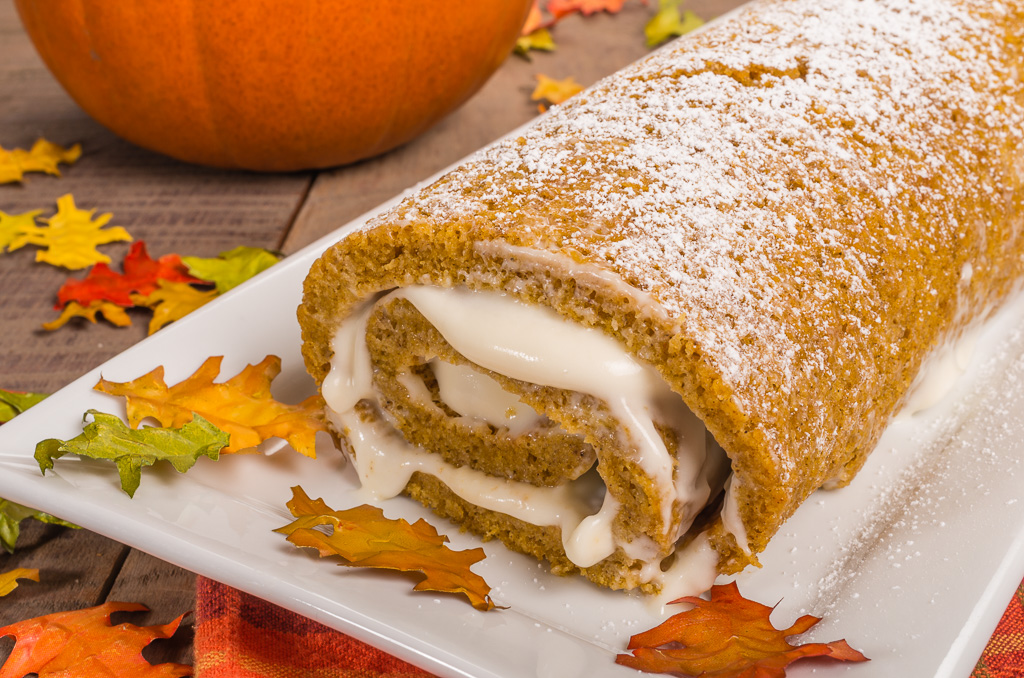
The pumpkin pie is the traditional dessert at the Thanksgiving table and here is a great and easy recipe to make “Nana’s Trax Pumpkin Pie”.   If you are looking to add something new to the Thanksgiving dessert table this pumpkin roll is the perfect addition.  The soft sponge cake with just the perfect amount of spices is rolled with cream cheese icing and dusted with confectioners sugar.

Pumpkin Roll with Cream Cheese Icing
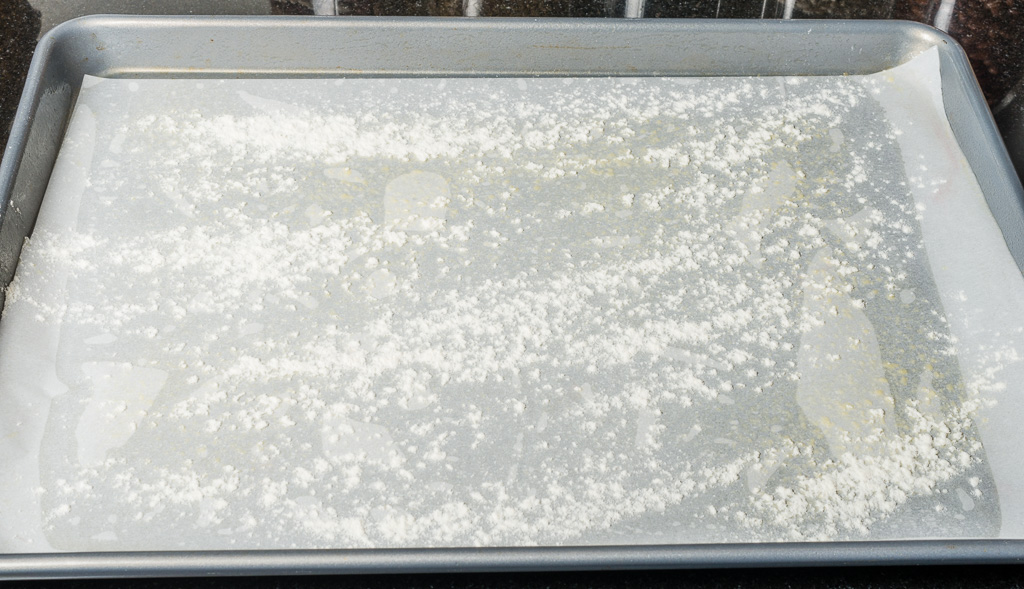
 Baking panPumpkin roll batterPumpkin rollPumpkin roll being rolled
Cake:
1/4 cup confectioners sugar
3/4 cup flour
1/2 teaspoon baking powder
1/2 teaspoon baking soda
3/4 teaspoon ground ginger
1/2 teaspoon ground cinnamon
1/4 teaspoon ground allspice
1/4 teaspoon ground cloves
1/4 teaspoon ground nutmeg
1/4 teaspoon salt
3 large eggs
1 cup sugar
3/4 teaspoon vanilla extract
2/3 cup fresh* or can pumpkin puree (not pumpkin pie filling)

Icing:
8 oz. cream cheese, softened
1 cup confectioners sugar
6 tablespoon butter, softened
1 teaspoon vanilla extract

Preheat the oven to 375 degrees.  Spray a 10x15x1-inch baking pan with cooking spray and line with a piece of parchment paper (this will make it easy to flip the cake after it is baked).  Spray parchment paper with cooking spray and dust with flour, set aside.  Lay out a large cotton kitchen towel on your work surface and dust with confectioners sugar.

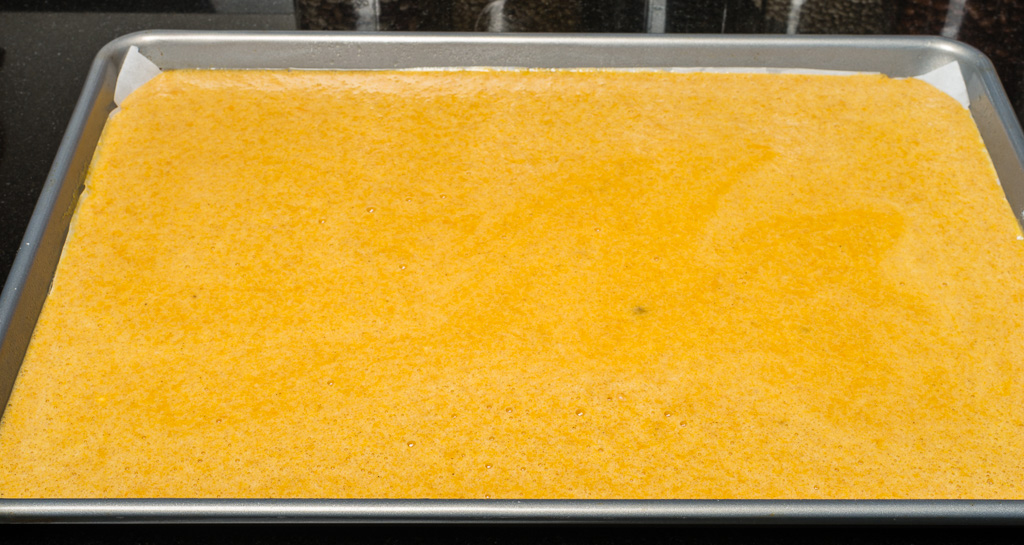
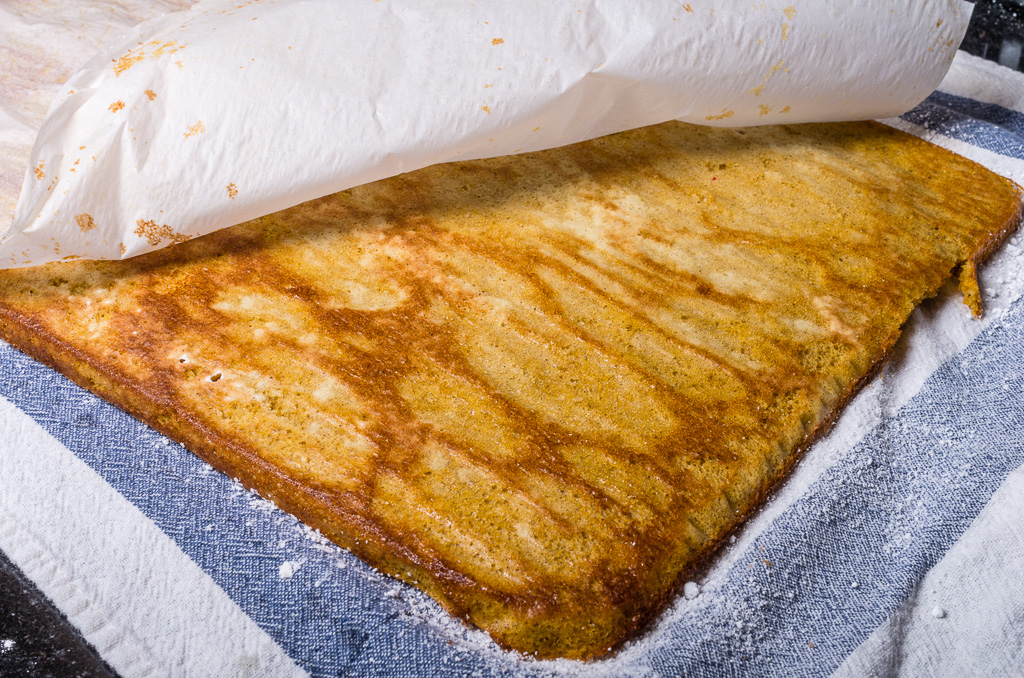
In a large bowl, whisk together flour, baking powder, baking soda, ginger, cinnamon, allspice, cloves, nutmeg and salt.  In a bowl of an electric mixer beat the eggs and sugar until the mixture is very thick.  Beat in the vanilla and pumpkin puree.  Add in the flour mixture and mix until combined.  With a spatula evenly spread batter in the prepared baking sheet.  Bake for 13-14 minutes, or until the top springs back when lightly touched.  Remove from oven and immediately turn the cake onto the confectioners sugar dusted kitchen towel.  Carefully peel off the parchment paper.  Starting at one of the short ends, rolling up the cake and towel together.  Cool on wire rack.

Pumpkin roll with icingTo make the cream cheese filling beat the cream cheese, confectioners sugar, butter and vanilla in the bowl of a electric mixer until smooth.

When the cake has cooled, unroll and remove the towel.  Spread the cream cheese filling over the cake, leavening a 1-inch border all around.  Starting at one of the ends, re-roll the cake.  Wrap in plastic wrap and refrigerate until ready to serve.  Dust with confectioners sugar before your serve.  This can be made a few days ahead of time.

*How to prepare a fresh pumpkin

Pumpkin roll with icing


Filed Under: baking, cake, desserts, family favorites, Fresh From Oregon, Holidays, Thanksgiving · Tagged: cream cheese, dessert, pumpkin, sweet, Thanksgiving

Fresh Cranberries

November 22, 2014 · by Carrie Trax ·

Cranberry Three jarsThis Thanksgiving or any holiday enjoy the sweet and tart taste of cranberries 3 ways.  Enjoy homemade jellied orange cranberry sauce that tastes better than the one from a can and so easy to do.  You can combine the fresh flavors of cranberries, oranges and apples with a little sugar and in a few minutes you will have a crisp relish your family will be asking for seconds of!  Cranberry glaze for your turkey (works good with ham too) will give you another depth of flavor to your holiday dinner.  Fresh cranberries are always a perfect addition to the holiday table.

Cranberry RelishOrange Cranberry Relish
1 (12 oz) bag whole fresh cranberries
2 tart green apples (I used Granny Smith), peeled, cored and cut into thick pieces
1 large seedless orange (peel on), cut into 12 pieces
1 cup sugar

In the bowl of a food processor add the cranberries, apples and orange pieces.  Pulse 12-14 times, do not over pulse or the relish will be mushy.  I used a Ninja Food Processor and it gave me the perfect relish with 12 pulses.  Place mixture in a bowl and mix in the sugar.  Let set for 45 minutes at room temperature.  It is ready to serve or place in a container and refrigerate for later.  Quick and easy and can be made the night before.
Recipe from ~ Simple Recipes


Jellied Orange Cranberry SauceJellied Orange Cranberry Sauce
2 (12 oz) bags whole fresh cranberries
2 oranges
1 3/4 cups water
2 cups sugar

Wash cranberries and add to a medium pot.  Squeeze juice from orange into the pot and add the orange halves and the 1 3/4 cups water. Boil until the cranberries skins burst, about 20-25 minutes.  Remove orange halves and over a bowl place a sieve or food mill and press through the cranberry mixture.  You will get juice in the bowl, discard the pulp left in the food mill.  Add juice to a medium saucepan and mix in the sugar. Boil to almost jelly point (see below spoon test)* or 220 degrees.  Pour into glass canning jars (I use 8 oz short jars).  If you are not processing the jars you can let set on your counter until cooled then add the lid and ring and place in refrigerator.  If you what to process the jars leave a 1/4-inch head space, add the lid and ring and process in a boiling water bath for 10 minutes.  These jars can now be left on your shelf.
*Spoon test ~ Dip a cool metal spoon into the boiling cranberry mixture. Raise the spoon out of the steam, about 12 inches above the pan. Turn the spoon so the liquid runs off the side. The cranberry sauce is done when the syrup forms two drops that flow together and form a sheet that hangs off the edge of the spoon.
Recipe adapted from ~ Ball Blue Book

Cranberry GlazeCranberry Glaze
1 (12 oz) bag fresh whole cranberries
1 cup water
1 cup sugar
1/4 teaspoon salt
1 teaspoon orange zest
2 tablespoons ginger, minced
2 teaspoons apple cider vinegar
1/8 teaspoon cayenne pepper
In a medium saucepan combine the cranberries, water, sugar, salt, orange zest, ginger and apple cider vinegar.  Simmer over a medium heat until the cranberries burst, about 15 minutes.  Remove from heat and stir in the cayenne pepper.  I do not like it too hot but if you want more of a kick add more cayenne to taste.  Place a mesh strainer over a saucepan and pour in cranberry mixture.  With a wooden spoon or rubber spatula push the cranberries around to help the mixture get through the strainer.  There will be nice thick cranberry pulp in your saucepan.  Over medium heat cook until glaze thickens, about 10 minutes.  With a basting brush coat the outside of your turkey 30 minutes before it is ready to come out of the oven.  Leave turkey uncovered after adding the glaze .  This glaze is also great tossed with meatballs as an appetizer or perfect to brush on a whole ham.
Recipe from ~ Brave Apron
Orange Cranberry Relish

Filed Under: appetizer, apples, Easter, Fresh From Oregon, fruit, Holidays, side dish, Thanksgiving · Tagged: cranberries, cranberry sauce, fresh, fruit, glaze, homemade, oranges, relish, Thanksgiving, thanksgiving side dish

Green Bean Casserole

November 19, 2014 · by Carrie Trax ·

Green bean casseroleLast year I wanted to make everything for my Thanksgiving dinner from scratch so I was on the hunt for the best Green Bean Casserole.  After looking through many cookbooks and searching the web I was watching TV and saw Good Eat’s and Alton Brown make his version of the Green Bean Casserole.  I decided this was the one I wanted to make and I am glad I did.  This was a delicious made from scratch recipe for the so popular Green Bean Casserole.  I made my onion topping a little different and used the Pioneer Woman’s recipe which is so tasty and crispy!

Homemade Green Bean CasseroleOnions frying in pan
Onion Topping ~ Pioneer Woman
1 whole large onion
2 cups buttermilk
2 cups flour
1 tablespoon salt
1/4 teaspoon cayenne pepper
1 quart canola oil
black pepper to taste

Slice onion very thin. Place in a baking dish and cover with buttermilk and soak for at least an hour. Combine dry ingredients and set aside. Heat oil to 375 degrees. Grab a handful of onions, throw into the flour mixture, tap to shake off excess, and PLUNGE into hot oil. Fry for a few minutes and remove as soon as golden brown. Lay on a paper towel-lined baking sheet.  Repeat until onions are gone.

Green Beans and Sauce ~ Alton BrownMushrooms & green beansMushrooms in a sauceCreamy mushrooms
2 tablespoons plus 1 teaspoon kosher salt, divided
1 pound fresh green beans, rinsed, trimmed and halved
2 tablespoons unsalted butter
12 ounces mushrooms, trimmed and cut into 1/2-inch pieces
1/2 teaspoon freshly ground black pepper
2 cloves garlic, minced
1/4 teaspoon freshly ground nutmeg
2 tablespoons all-purpose flour
1 cup chicken broth
1 cup half-and-half

Preheat the oven to 475 degrees F.  Bring a gallon of water and 2 tablespoons of salt to a boil in an 8-quart saucepan. Add the beans and blanch for 5 minutes. Drain in a colander and immediately plunge the beans into a large bowl of ice water to stop the cooking. Drain and set aside. Melt the butter in a 12-inch cast iron skillet set over medium-high heat. Add the mushrooms, 1 teaspoon salt and pepper and cook, stirring occasionally, until the mushrooms begin to give up some of their liquid, approximately 4 to 5 Homemade Green Bean Casseroleminutes.  Add the garlic and nutmeg and continue to cook for another 1 to 2 minutes. Sprinkle the flour over the mixture and stir to combine. Cook for 1 minute. Add the broth and simmer for 1 minute. Decrease the heat to medium-low and add the half-and-half. Cook until the mixture thickens, stirring occasionally, approximately 6 to 8 minutes. Remove from the heat and stir in 1/4 of the onions and all of the green beans. Top with the remaining onions. Place into the oven and bake until bubbly, approximately 15 minutes. Remove and serve immediately.


Onion Topping ~ Pioneer Woman

Green Beans & Sauce  ~ Alton Brown’s Green Bean Casserole recipe


Filed Under: cast iron cooking, Easter, family favorites, Holidays, side dish, Thanksgiving, vegetables · Tagged: cast iron, fried onions, greeb beans, green bean casserole, mushroom sauce, mushrooms, Thanksgiving, thanksgiving side dish

Festive Yam Casserole

November 17, 2014 · by Carrie Trax ·

Baked yam casserole25 years ago I was given this recipe for Festive Yam Casserole from a co-worker and have been serving it at my Thanksgiving dinner since.  The layer of creamy yam filling with the crunchy topping of pecans and coconut will become  a family favorite at your dinner table.  This is a great side dish at any holiday table or everyday meal.

Festive Yam Casserole
4 cups yams, cookedWhole yams being peeled with peels
1/4 cup granulated sugar
1/4 cup milk
1/3 cup butter, melted
1 teaspoon vanilla extract
2 eggs, beaten

Topping

2/3 cup shredded coconut
2/3 cup brown sugarYam casserole with pecans and coconut
1/3 cup flour
1/3 cup butter, melted
2/3 cup pecans

Preheat oven to 350 degrees.  In large bowl add the yams and mash with a potato masher or fork.  Add the sugar, milk, butter, vanilla and eggs and mix well.  You can also combine all the ingredients in the bowl of a Ninja Food Processor and pulse until creamy, about 45 seconds.  Spoon into an 8 inch baking dish that has been sprayed with cooking spray.  In the bowl of a food processor combine the coconut, brown sugar, flour, butter and pecans and pulse for 30 seconds.  In the Ninja Food Processor pulse 4 times.  Sprinkle over yam mixture and bake uncovered for 30 minutes or until golden brown and hot.


Filed Under: Easter, family favorites, Holidays, lunch, potatoes, side dish, Thanksgiving, vegetables · Tagged: baked, coconut, pecans, side dish, sweet potatoes, than, thanksgiving side dish, yams

Classic Deviled Eggs

November 15, 2014 · by Carrie Trax ·

Photo: John Trax

Thanksgiving dinner would not be complete without “Classic Deviled Eggs”.  My family does not like anything fancy just your basic deviled eggs like I remember growing up.  If there are any extra leftover deviled eggs add them to your favorite potato salad recipe the next day to enjoy with your turkey sandwich! Egg yolks in Ninja food processoregg yolks in Ninja food processor

Classic Deviled Eggs
8 eggs
1/3 cup Miracle Whip or Mayonnaise if your prefer
1/2 teaspoon dry mustard
1 teaspoon white vinegar
Salt & pepper to taste
Paprika, garnish
Fresh Parsley, garnish

Add eggs to a pot and add enough water to cover eggs about 1 inch.  Bring to a boil, remove from heat and cover with a lid for 20 minutes.  Drain water and run cold water over eggs for a few minutes.  Crack and peel off the egg shells.  Cut eggs in half lengthwise and remove the yolk and set the egg whites aside for now. Place the egg yolks, Miracle Whip, dry mustard, vinegar and a pinch of salt and pepper in a bowl of a food processor and blend until creamy.  If you have a Ninja Food Processor just use the puree button which pulses and blends for 65 seconds.  If you want to do by hand mash with a potato masher until no longer lumpy.  Taste and add more salt and pepper if needed.  I wanted to be a little fancy so I placed the mixture to a pastry piping bag that I had attached a star tip.  Pipe mixture into each egg white sprinkle with a little paprika and garnish with a piece of parsley.  It is that simply and easy.

2014.11.09@16.58.32._K5I0980


Filed Under: appetizer, Easter, Holidays, lunch, Main Dishes, side dish, Thanksgiving · Tagged: creamy, deviled eggs, eggs, side dish, Thanksgiving

Roasted Turkey with Homemade Cracker Stuffing

November 12, 2014 · by Carrie Trax ·

Turkey in blue roasting panThe roasted golden bird, the Turkey is the center piece of any Thanksgiving table.  But in my family the favorite dish is my family’s cracker stuffing passed down from my mom from my grandmother and great grandmother.  For four generations and probably longer it has been a holiday tradition making cracker stuffing in my family.  My great grandmother comes for the town of Vejvanov, West Bohemia, Czech Republic a small city south west of Prague.  I wanted to learn more about the history of cracker stuffing and read several Bohemian cookbooks and searched the internet.  I found that it is called (Nádivkou) or Bohemian Cracker Stuffing. Crackers seemed to be an easy substitute for stale bread or bread crumbs.  All the recipes I found online seem to be just a little different than mine, with an extra ingredient or seasoning but we like our basic one made with the recipe below.  It was even featured on the Food Network’s kitchen website when I entered the recipe in a Stuffing Cook-off contest.

Cracker StuffingCrackers in a Ninja food processorCracker, onions and celery in vintage bowlBowl of cracker stuffing with eggsCracker stuffing in vintage bowl
4 sleeves saltine crackers
2 stalks celery
1 cup butter
1/4 teaspoon black pepper
1 medium onion, chopped
4 eggs
1/2 cup milk
12-14 pound Turkey
4 stalks celery
6 carrots, peeled
2 can chicken broth
Olive oil
Salt & pepper
To make my cracker stuffing I used my Ninja food processor attachment this year to crush my crackers and chop the celery, it made my crackers more consistent in size.  In the bowl of the Ninja food processor place one sleeve of crackers and pulse three times.   That’s all it takes to make the perfect size cracker for this recipe.  Empty crackers from the Ninja into a large bowl and repeat with the remaining crackers.  In the same food processor bowl add the celery and pulse 8 times then add the celery to the crackers in the bowl.  If you do not have a Ninja (add it to your wish list) you can crush the crackers by hand.  With the crackers still in their sleeves, crush them with your hands (easier to crush this way, and it keeps your hands cleaner) then empty the sleeves into a large bowl. Chop celery into small pieces and add to the crackers.  In a frying pan, saute the butter, onion and black pepper until the onions are tender, about 5 minutes. No need to add salt since you are using saltine crackers.  Add cooked onions  to the crackers and mix well. Add eggs and mix well. Add milk a little at a time (you might not use all of the milk), until the cracker mix is moistened. Cracker mix should form a ball which you can hold in your hand. When stuffing a turkey with cracker stuffing it does not expand, so you want to pack it in tight. With traditional bread stuffing you would pack it in the turkey loosely.  When the turkey is ready, you pull out the cracker stuffing in one big chunk and slice it. Also great on a turkey sandwich the next day!
To prepare the turkey remove from packaging.  Remove the neck (Do not worry it has been already cut off and is inside the turkey cavity).  On the back end of the turkey there will be a bag of giblets including the heart, gizzard and liver.  It may not sound good but do NOT throw away the neck and the giblets it will make a great turkey stock so just place all together in a bag and refrigerate.  I will share in a later post the best turkey stock recipe using these parts and the carcass of the turkey after you have carved off all the meat.  Rinse turkey under cold water and pat dry with paper towel.  In your roasting pan add 4 stalks of celery and 6 carrots that have been cut up and toss with 2 tablespoons of olive oil and sprinkle with salt and pepper. They will also be used later in making the turkey stock.  Carrots and celery in roasting panPlace turkey on top of carrots and celery.  Stuff the cavity of the turkey with the cracker stuffing and remember to pack it in tight.  Do not forgot there is room in the back of the turkey where the giblets were so pack some stuffing in there as well.  There is no need to tie the legs together just let the stuffing flow out the cavity.  Rub some olive oil on the turkey and sprinkle with salt and pepper.  This will help give your turkey a nice golden brown color and add flavor to the skin.   Add two cans of chicken stock to the pan and cover with a nice tall lid.*  Place in a preheated 325 degree oven and since we stuffed the turkey it will take 4 to 4 1/2 hours to cook.  The turkey is done when the thigh meat reaches an internal temperature of 165 degrees F.Cracker stuffing in vintage bowl
* I have found over the years that if you have a tall lid on your turkey when it is cooking the air can circulate and your turkey will come out a golden brown without having to remove the lid the last 30 minutes to brown it.  You may choose to bast the turkey once an hour with the juices from the bottom of the pan.  I seem to get so busy I never remember and it bastes itself just fine with the tall roasting pan I use.
Do not forget after Thanksgiving dinner is over, save anything left in the pan, the turkey bones, pieces, carrots, celery, juice and bits left in the roasting pan.  Place in a container and get ready to make some turkey broth to use in some other great dishes like turkey chili, turkey wild rice soup, turkey pot pie or in place of chicken broth in any of your favorite recipes.
Roasted turkey in blue roasting pan

Filed Under: family favorites, Holidays, Main Dishes, side dish, Thanksgiving, turkey · Tagged: crackers, dinner, dressing, holiday, side dish, stuffing, Thanksgiving, Turkey

Roasted Pumpkin Soup with Pumpkin Seeds & Goat Cheese

November 9, 2014 · by Carrie Trax ·

Roasted Pumpkin Soup

With Thanksgiving  approaching soon  I wanted to start planning my meal.  With the newest addition to my kitchen the Ninja Blender and attachments I wanted to see if I could use it with every recipe I will be making for the Thanksgiving table.  So the challenge begins and the first thing we will start my Thanksgiving meal off with is a “Roasted Pumpkin Soup”…

Roasted Pumpkin Soup
3 pounds sugar pumpkin, seeded
and peeledRoasted pumpkins, onions and mushrooms
1 onion, peeled and quartered
2 shiitake mushrooms, stemmed, cleaned
1 garlic clove, peeled
1/2 cup olive oil
2 teaspoon coarse salt
1/4 teaspoon freshly ground pepper

4 cups chicken or vegetable stock
1/2 cup heavy cream
1/4 cup roasted pumpkin seeds*
1/3 cup crumbled goat cheese with dried cranberries

Preheat oven to 450 degrees. Cut pumpkin into 2-inch pieces. Combine pumpkin, onion, mushrooms, and garlic on a rimmed baking sheet.  Addroasted pumpkins, onions and mushrooms in a Ninja Blender oil, salt and pepper; toss to coat, then spread in a single layer. Roast until pumpkin is tender when pierced with the tip of a sharp knife, about 30 minutes, rotating pan and tossing vegetables halfway through. Let cool.

Transfer vegetables to the Ninja blender and pour in 2 cups stock; push the Auto-iQ Food Puree button. Just sit back for a minute and wait.  The soup has been pureed perfectly.  Add soup to a pot with remaining 2 cups of stock. Bring soup just to a simmer and add the heavy cream. Continue simmering until heated.  Remove from heat, and season with salt and pepper if needed. Serve in a bowl and top with toasted pumpkin seeds and goat cheese.  Great recipe you can make 1 or 2 days before Thanksgiving!

*I used the pumpkin seeds from the pumpkin I used to make the soup.  Here is a recipe for Roasted Pumpkin Seeds

Recipe adapted from: Martha Stewart

Roasted Pumpkin Soup

Filed Under: Fresh From Oregon, Holidays, lunch, Main Dishes, soup, Thanksgiving, vegetables · Tagged: dried cranberries, goat cheese, harvest, pumpkin, pumpkin seeds, pumpkin soup, roasted, roasted pumpkin soup, soup, toasted, vegetable

Ninja + Apple Cider = Fresh Apple Slushie

November 6, 2014 · by Carrie Trax ·

2014.10.31@18.54.18._K5I0113 What a surprise to find my Nutri Ninja® – Ninja® Blender DUO with Auto-iQ™ had arrived on my front step this week.  This past September I attended the IFBC (International Food Blogger Convention) in Seattle, Washington.  During lunch sponsored by Ninja, celebrity chef from “The Biggest Loser,” Devin Alexander demonstrated and showed us some real “WOW” factor using the NEW one touch Ninja blender.  Several recipes were demonstrated using all the different attachments for the Ninja and I thought this is a great kitchen appliance that can be a space saver in the kitchen.  After the conference I was sent this amazing blender system to use and review.   In just one BIG box I had the master base with a blender, food processor bowl plus three sizes of Nutri Ninja® cups.  After washing everything and reading the manual I was ready to make my first recipe.  Ninja BlenderThe first attachment I wanted to try was the blender.  The large blender at 72 oz is a perfect size to make large batches of any frozen treat.  A few days ago I froze some fresh Oregon apple cider in ice cubes trays to be ready to make a fresh apple cider slushy.  Adding 12 apple cider ice cubes with 1 cup of fresh apple cider in the blender I was ready to create a fresh frozen treat.  With the Ninja® Auto-iQ™ technology everything is already programed for you with just one push of the button.  With the unique blending, pulsing,  and  pausing I had the perfect apple cider slushy in just a minute.  What makes this different from other blenders is the Total Crushing® Blades, it pulverized the apple cider ice cubes in seconds making a smooth fresh drink for my family.  The recipe combinations are endless with the Ninja® Auto-iQ™ blender.  Not just for smoothies either, you can create homemade ice cream, sauces, soups and so much more.    Here are some of the features you will love with Ninja® Blender with Auto-iQ™:

Total Crushing® BlenderApple cider ice cubes in Ninja Blender
~ Pre-programmed setting – With one push of the button the Auto-iQ™ does the work for you.
~ With the Frozen Drink Smoothies button you will be creating frozen drinks, milkshakes or smoothies in just one minute.
~ Total Crushing® Blades pulverizes ice or frozen fruit in seconds.
~ The Puree button also has Auto-iQ™ technology so with one push of the button you will be making homemade sauces, dips or soups perfect for everyday meals or your next party in just minutes.
~ Easy to attach, Easy to use and Easy to clean, its that Easy!

Watch for my next post using the Ninja® Blender for roasted pumpkin soup perfect for the upcoming holiday.

Apple Cider Slushy ~ Makes 3 pint glasses
Add 12 apple cider ice cubes + 1 cup cold apple cider to Ninja® Blender and push the Frozen Drink/Smoothie button.  Watch it blend, pulse and pause for a minute pour into a glass and enjoy the fresh taste of apples!


Ice cube tray of apple ciderApple cider ice cubes


Apple cider slushies

Filed Under: apples, Fresh From Oregon, fruit · Tagged: apple cider, apples, blender, cider, drink, fresh, healthy, Nutri Ninja

The Best Apples for Applesauce

October 26, 2014 · by Carrie Trax ·

2013.11.02@12.06.24._K5I8251The Best Apples for Applesauce
There are many apples to choose from this time of year and it is hard to know which are the best for pies, eating, salads, baking and yes, applesauce.  I started canning applesauce so I could have that fresh taste long after the apples I like are no longer available.  You can use just one type of apple or you can mix a few varieties together for a unique flavor.  I do both, my favorite applesauce apple is the Jonagold.  Jonagold is a cross between a Golden Delicious apple and a Jonathan apple.  It is juicy and has a sweet-tart taste to it, making it a great apple all by itself for a batch of applesauce.  The applesauce is a nice golden color (left jar above). If you like an applesauce that is a nice white color McIntosh apples are the way to go.  They have a shiny red and green skin with a beautiful white flesh.  They are more on the tart side so a little more sugar may be needed.  But this will give you the whitest applesauce (middle jar above).  My favorite applesauce combines three different apples together, the Jonagold, McIntosh and Honeycrisp apples.  The Honeycrisp has become one of the most popular eating apples these days.  It is a firm apple so it will keep well and it has a sweet and tart taste.  So combining all three you have all the best parts of these apples in one full of flavor applesauce.  Now is the best time of the year to can your applesauce so you can have that Fresh From Oregon taste all year long.

Applesauce
~ makes 8 pint jars
18 apples, peeled and diced
1 cup water
1 1/2 tablespoons lemon juice
1 1/2 -2 cups sugar, depending on your apples sweetness and how sweet you like it *
1-2 teaspoons cinnamon (optional)

Place apples in a large pot with the water and lemon juice.  Bring to a boil or medium heat, reduce heat to a simmer and cover with a lid for about 15-20 minutes or until soft.  Stir about every 5 minutes so your applesauce does not burn.  Add more water 1/4 cup if it looks too thick and it’s sticking to the bottom of the pot.  Once the apples are soft use a masher to break up the apples into smaller pieces.  I like my applesauce more on the chunkier side.  If your family likes a smoother applesauce you can run it through a food mill or food processor.  Add the sugar and mix until sugar is dissolved.  You can add some cinnamon at this time depending on your taste.  I prefer to add my cinnamon to my applesauce once I open the jar to serve**.

To process applesauce have your pint jars nice and hot (about 10 minutes before applesauce is ready I run my jars on the quick cycle, 7 minutes, on my dishwasher and leave them until I am ready to use).  Have a water bath canner ready and boiling.  Pour finished hot applesauce into jars leaving a 1/2″ headspace.  Wipe the rim of the jar, add lid and ring and hand tighten.  Add to the boiling water bath canner and process for 20 minutes once the water returns to a boil.  Remove and let set for 24 hours.  Check to make sure all the lids have sealed and they are ready to store.

* I think that the combination of apples above Jonagold, McIntosh and Honeycrisp are just perfect and I use very little or no sugar depending on the taste after it is cooked

** To serve applesauce: open and pour into a bowl.  You can serve cold or I like to put it into the microwave for 30 seconds, stir and heat another 30 seconds.  Sprinkle with some cinnamon and it is ready to serve!

If you live in Oregon, Hood River is a great place to buy apples straight from the orchard.   Kiyokawa Family Orchard is my favorite place to buy apples.

Apple display at Kiyokawa Family Orchards


Filed Under: apples, canning, family favorites, Fresh From Oregon, fruit, side dish ·

Deep Dish Taco Skillet Pizza

October 20, 2014 · by Carrie Trax ·

2014.10.07@17.48.29._K5I9708

Here is another recipe for the great products I received at the 2014 IFBC in Seattle this year.  The Krusteaz Flatbread mix makes an awesome dough for pizza.  The flavors of the Italian Herb in the mix adds that extra layer of flavor to this pizza.   Let’s not forget the sauce of this pizza is BEANS, not just any beans but “Better Bean” made local here in Oregon.  They have six flavors and I thought the best one for this deep dish pizza was their Uncanny Refried Black Beans.  To finish off the Taco pizza I added a layer of lettuce and diced tomatoes saving the top of the pizza for the Pearls “Olive to Go” Sliced Black Olives.  These ready to go single serving containers are great to have on hand as a topping for pizza but also great for a salad, garnish or just eating right out of the container.

Deep Dish Taco Skillet Pizza
~ Makes 2 pizzas

1 Box Krusteaz Flatbread Mix “Italian Herb”
1 cup warm water (115-125 degrees)
1/4 cup canola oil
1 container Better Bean Uncanny Refried Black Beans
2 cups prepared taco meat
1 cup shredded Cheddar cheese
1 cup shredded Mozzarella cheese
2 cup lettuce, shredded
1 cup tomatoes, diced
Pearls Olive to Go Sliced Black Olives, 2 single serving container

Preheat oven to 475 degrees.  Lightly grease two 12″ cast iron skillets*.
In medium size bowl stir together the Krusteaz flatbread mix and yeast packet enclosed.  Add warm water and oil, stirring until dough forms a ball.  Cover bowl with plastic wrap and let rest for 10 minutes.
Divide the dough in half and in prepared cast iron skillets place dough ball and with your fingers push and shape to fit the skillet.  I like a thick crust so I pushed some extra dough along the rim of the skillet.  Spread 1/2 of the “Better Bean” Uncanny Refried Black Beans over each flatbread dough.  Divide in half and sprinkle the prepared taco meat evenly over the beans and then sprinkle both cheeses over the pizzas leaving about 1/2″ of the dough bare for a nice crust.  Place in a the 475 degree oven for 12-15 minutes or until crust is golden brown and cheese is melted and light brown.
Remove from oven and evenly layer the lettuce, tomatoes and Pearls Olive to Go Sliced Black Olives.  Remove from pan, cut and serve hot.  Sour cream adds a great addition to this pizza!
* If you do not have cast iron skillets you can shape and place the flatbread dough on any baking pan or pizza pan.

2014.10.07@17.48.52._K5I9711


Filed Under: baking, bread, cast iron cooking, Fresh From Oregon, lunch, Main Dishes, tomatoes, vegetables · Tagged: baking, Better Beans, flatbread, Italian, Krusteaz, Pearls Olives, Pizza, quick, taco

  • « Previous Page
  • 1
  • …
  • 4
  • 5
  • 6
  • 7
  • 8
  • …
  • 15
  • Next Page »

Fresh From Oregon!

Welcome to Fresh From Oregon! Read More…

Subscribe to Blog via Email

Enter your email address to subscribe to this blog and receive notifications of new posts by email.

Join 37 other subscribers

Connect With Me

  • Email
  • Facebook
  • Flickr
  • Google+
  • Instagram
  • Pinterest
  • Twitter

Featured Posts

Pacific Northwest Easter Dinner

Pacific Northwest Easter Dinner

Moving to the Pacific Northwest almost 5 years ago I discovered how wonderful the different types of fresh fish are to cook with.  There are many different types of fish runs throughout the year with Salmon and Steelhead (Trout).  I decided this year that I wanted to make a meal the night before Easter that […]

Choco………..late Covered Yummy Eggs!

Choco………..late Covered Yummy Eggs!

I was busy this weekend making chocolate covered chocolate eggs for all my family back on the east coast.  I had 25# of chocolate wafers and run out.  I did get 137 eggs done with all my families favorite fillings: Coconut, Peanut Butter, Caramel, Chocolate Truffle and Marshmallow.  It was my first time making homemade […]

Strawberry Jamming

Strawberry Jamming

Just before the strawberry season ends here in Oregon I wanted to get a few jars of jam done that I can enjoy throughout the year.   I always make my family’s favorite Strawberry Lemonade Jam, with every bite you get that fresh strawberry taste with pieces of lemon peel.  But this year I decided to […]

Homemade Strawberry Sauce

Homemade Strawberry Sauce

The smell of ripe, juicy strawberries fresh from the field is what I wait for every spring here in Oregon.  Strawberry season is different depending on where you live, but here in Oregon it can start as early as the first week in May.  During my visit this weekend at the local farmers market I […]

Recent Posts

  • Washington Asparagus Fresh at your local Market Now!
  • Asparagus Salad with Lemon Vinaigrette
  • Fresh from Oregon heads to California
  • Summer Corn & Crab Chowder
  • Fresh Asparagus with Eggs Benedict
  • The Best Way to Store Asparagus
  • Roasted Asparagus with Lemon Olive Oil
  • Spring in Finally here in Oregon
  • Simply Natural ~ Lindsay Olives
  • Capay Valley Ranches ~ California Olive Oil at its Best!
  • Over the Top Blueberry Muffins
  • Fresh Homemade Blueberry Sauce
  • The BEST Homemade Granola
  • Homemade Strawberry Lemon Jam
  • Strawberry Cheesecake in a Jar
  • Homemade Strawberry Sauce
  • Asparagus Caesar Salad
  • Fresh from the Oregon Coast ~ Cioppino for Two!
  • Pancake Hearts for Breakfast
  • Homemade Chicken Noodle Soup
  • Apricot Coffee Cake with Crumb Topping
  • The Great Food Blogger Cookie Swap 2015 ~ Christmas Swirl Sugar Cookies
  • Best Ever Homemade Pie Crust
  • Mini Apple Hand Pies are perfect for the Lunch Box!
  • What to do with all the Green Tomatoes … Fried Green Tomatoes
  • Bays English Muffins Pumpkin Pudding
  • Stonyfield Yogurt… Good Morning Parfait
  • Bays English Muffins perfect for your Lunch Box!
  • Dutch Apple Pie ~ Just the right bite!
  • Corn Relish … Summer in a Jar
  • Mixed Berry Bread Pudding
  • Fresh Oregon Berry Tart
  • The Hoods are here… Mini Strawberry Pretzel Pie
  • Strawberry Rhubarb Sauce
  • B “S” T Egg Salad Sandwich
  • Melt in your Mouth Reuben Sandwich

Archives

Meta

  • Log in
  • Entries feed
  • Comments feed
  • WordPress.org

Experience fresh food from Oregon!

Recipe Master: Carrie Trax Editor: John Trax
Photographer: John Trax

Categories

Copyright 2014 Fresh From Oregon

Copyright © 2025 | Innovative by The Pixelista | Built on the Genesis Framework