• Home
  • Blog
  • About

Fresh From Oregon

Experience the Fresh Taste of Oregon...

  • award winning recipes
  • baking
    • bread
  • breakfast
  • canning
  • cast iron cooking
  • desserts
    • cake
    • candy
    • chocolate
    • cookies
    • pies
  • family favorites
  • fresh from oregon
    • farmers market
    • favorite products
    • hazelnuts
    • oregon made
    • pacific northwest trips
  • fruit
    • apples
    • berries
    • peaches
    • pears
  • holidays
    • easter
    • thanksgiving
  • lunch
  • main dishes
    • beef
    • chicken
    • pork
    • seafood
    • soup
    • turkey
  • side dish
    • pasta
    • salad
    • snack
  • vegetables
    • potatoes
    • tomatoes

Apricot Coffee Cake with Crumb Topping

January 9, 2016 · by Carrie Trax ·

Apricot Coffee CakeIt is the middle of winter in Oregon and the snow is falling here on the mountain today.  I had been sorting through some items my mom sent me last year and came across several old cookbooks.CookookCookook  
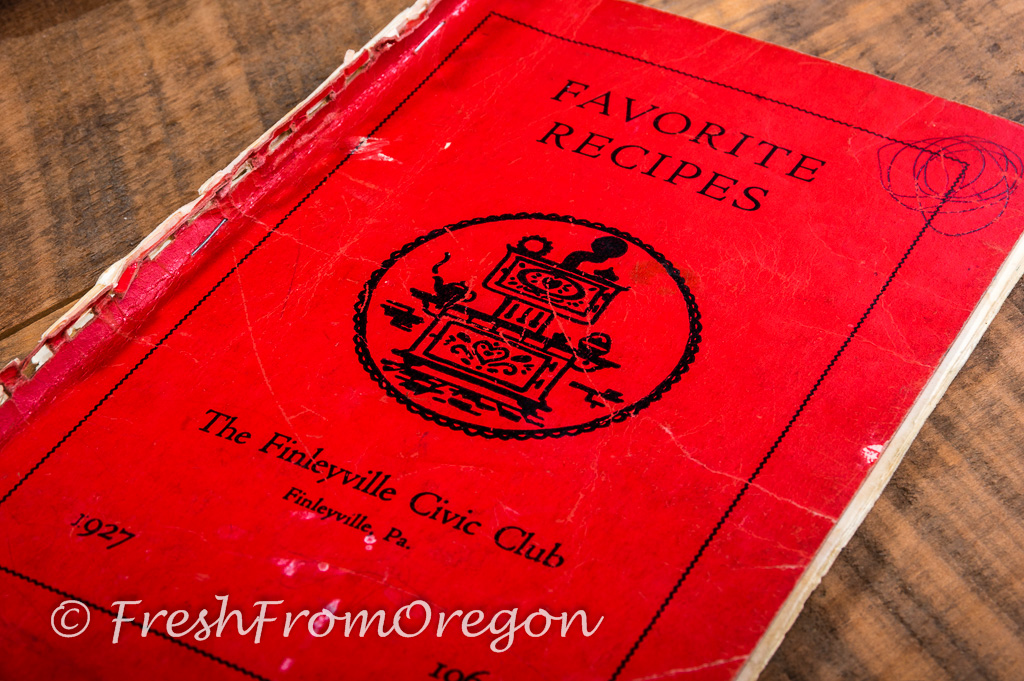
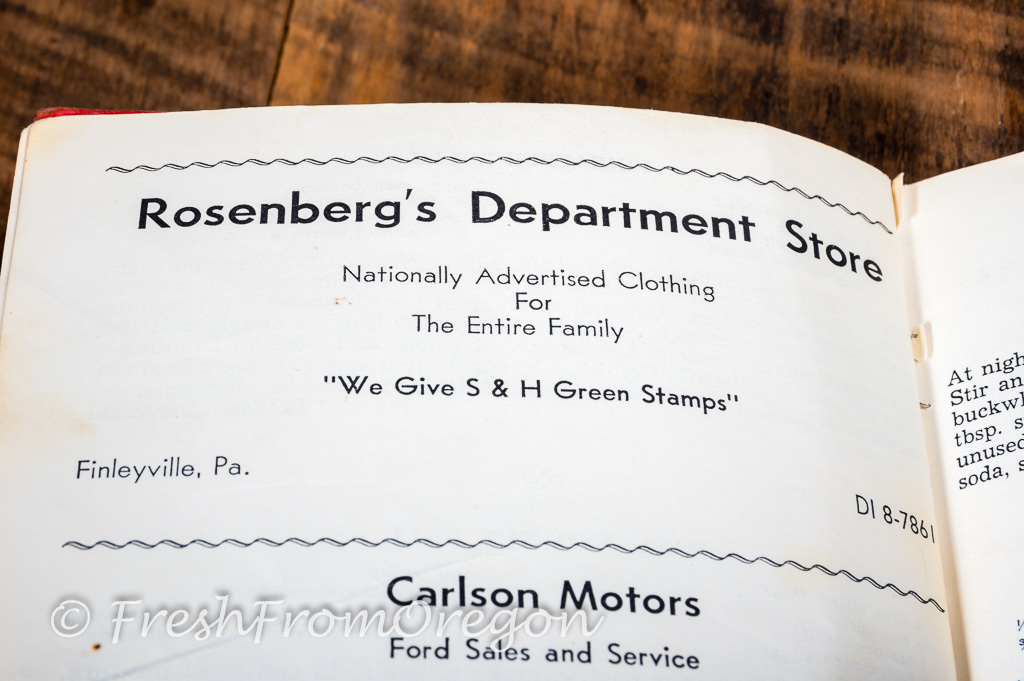
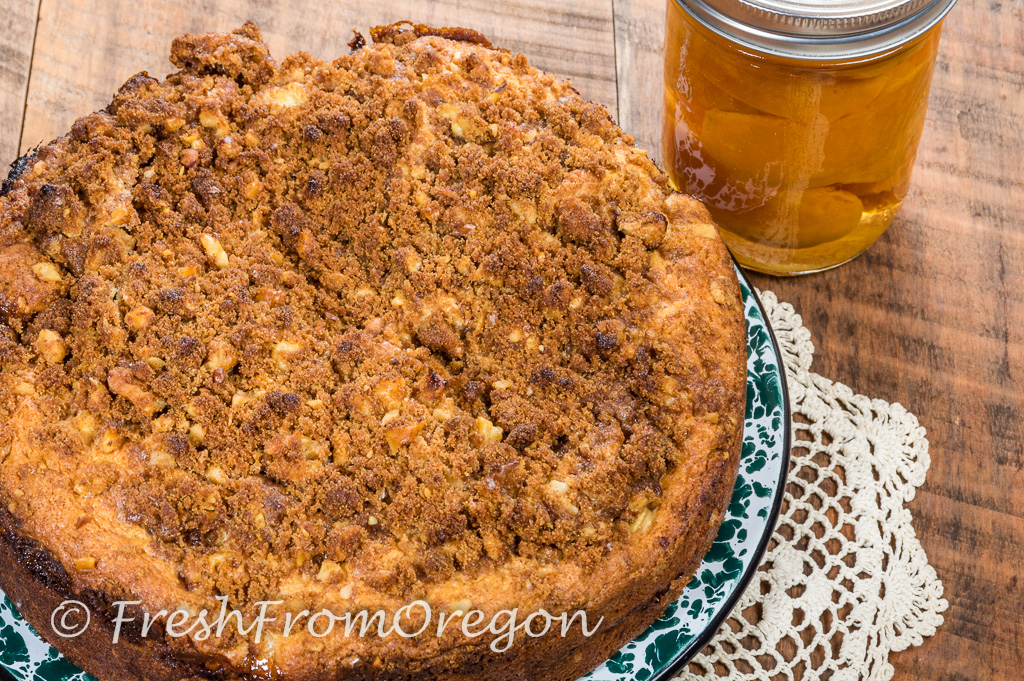
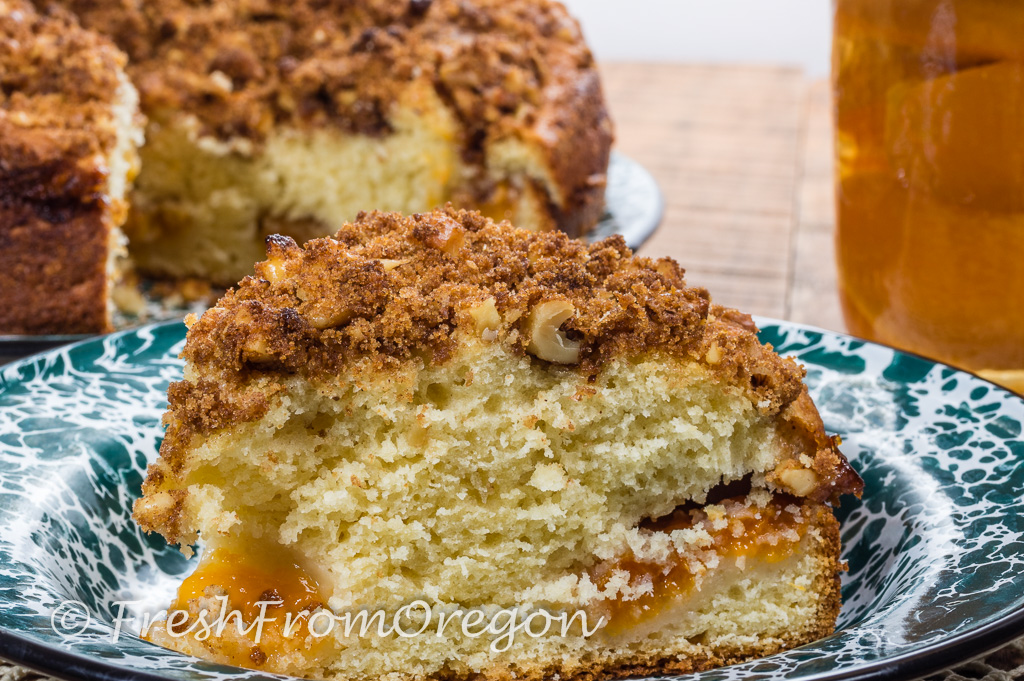
I see they are not only from my hometown Finleyville, Pennsylvania, but also published the year I was born 1962.  As I was going through the book looking at the recipes I discovered old advertising ads and still remember some of the stores we shopped at as I was growing up.  It brings back a lot of memories of shopping at “Rosenberg’s Department Store” where we bought all of our clothes (No big shopping malls back then), if my mom did not make them.  Also one of our treats for the week was going to “Boyka Tavern” to have a Hot Hamburger sandwich, a meaty hamburger sandwiched between two pieces of thick white bread then covered with the “BEST” gravy and homemade french fries.  Old cookbooks have so much history and great memories.  As I was looking at many of the recipes the Apricot Coffee Cake caught my eye.  Today is “National Apricot Day” and what a great recipe to try from this vintage cookbook.  I did have to do a few adjustments.  It said to use a 6″x10″ pan but that is not a size I have ever seen.  I also wanted to bake this so I could display it out of the pan so I choose to used a 9-inch springform pan.  If you just want to leave it in the pan you can also use a 13×9 baking pan.  Since this pan is larger than the original size I multiplied the recipe by 1 1/2 times and added more time for baking.  Apricots are not fresh this time of the year in Oregon but I had several jars I canned last summer and they were perfect for this recipe.  I also increased the amount of apricots since this was a large cake and wanted a little more apricots in the center of the coffee cake.  This was an easy recipe to make and the batter was so silky and it tasted amazing.  With recipes all over the internet these cookbooks are long forgotten but have such amazing recipes.  So if you have some old cookbooks packed away in the basement or attic get them out and discover some of the recipes long lost and maybe they will bring back some memories for you!

Apricot Coffee Cake
2 1/4 cups flourApricot Coffee Cake
1 cup sugar
4 1/2 teaspoon baking powder
3/4 teaspoon salt
1/3 cup shortening
3/4 cup milk
2 eggs
1 1/2 teaspoons vanilla extract
2 cups canned apricots

Topping:
1/2 cup brown sugar
2 teaspoons flour
2 teaspoons cinnamon
2 tablespoons butter, melted
1/2 cup walnuts, chopped

Preheat oven to 350 degree.  Spray a 9-inch springform pan or 13×9-inch baking pan with non-stick spray, set aside. In a mixer bowl combine the flour, sugar, baking powder and salt and mix to combine.  Add shortening and with a pastry blender or fork cut into the flour mixture.  Add the milk, eggs, and vanilla and beat until the batter is smooth, about 2 minutes.  Spread 1/2 the batter into the prepared pan.  You can mash up the apricots and spread over the batter or lay the apricot pieces over the batter. Top with the remaining batter.  Combine all the topping ingredients and sprinkle over the batter.  Bake for 30-45 minutes or until a toothpick inserted in the middle comes out clean.

CookookCookookApricot Coffee Cake


Filed Under: baking, breakfast, cake, desserts, fruit, snack · Tagged: apricots, baking, cofee cake, crumb topping, dessert, fruit, sweet

The Great Food Blogger Cookie Swap 2015 ~ Christmas Swirl Sugar Cookies

December 16, 2015 · by Carrie Trax ·

2015.11.30@21.23.02._K3_4578


This is my second year as a participant in the 5th annual The Great Food Blogger Cookie Swap.   From across the United States and 5 other countries 467 Food Bloggers participated this year raising $1,790.44 for Cookies for Kids’ Cancer.  These great sponsors matched all of our donations bringing it to $7,000 raised, so a big thank you to OXO, Dixie Crystals, and Land O Lakes.   2015.11.21@10.12.35._K3_4093OXO sent everyone who participated an 7 piece set of liquid measuring cups and a silicone baking sheet from Dixie Crystals which was perfect for baking my Christmas Swirl Sugar cookies.  The way it works each blogger sent out 3 batches of home baked cookies and received 3 batches of cookies from other bloggers in return.  Not only did I get boxes of homemade cookies delivered to my door, but I also got to support Cookies for Kids’ Cancer.

I packaged 1 dozen of my Christmas Swirl Sugar cookies in cute tins and sent to 3 bloggers.  Whole and Heavenly Oven from Wisconsin, Micky What Micky Eats from Washington DC and The Full Tummy from California.   All three have created some great blogs with interesting recipes, you should check them out!

The first batch I received was from LeAndra at Love & Flour she sent Bourbon Chocolate Chip Cookies.  The next batch I received was from Take Two Tapas.  They sent yummy cookies packed in a cute tin!  My third and last batch was from Alicia at The Baker Upstairs.  Her melt in you mouth Honey Lavender Shortbread cookies were amazing!  Check our their blogs and get the recipes for the cookies they baked for the cookie swap.

Here is the recipe for the cookies I baked for The Great Food Blogger Cookie Swap!

Christmas Swirl Sugar Cookies2015.11.30@15.46.28._K3_4445
1 cup unsalted butter, room temperature
1¼ cup sugar
1 egg
1½ teaspoons vanilla extract
½ teaspoon almond extract
3 cups of flour
1½ teaspoons baking powder
¼ teaspoon salt
Non-pareils for decorating
In a large mixing bowl, cream together butter and sugar until light and fluffy, about 2 minutes. Add in egg, vanilla extract, and almond extract and mix until combined. In a separate bowl, combine flour, baking powder, and salt. Slowly add the flour mixture to the butter mixture and mix until completely combined.2015.11.30@17.31.38._K3_4459
Divide dough into three equal parts. Put one into the mixer bowl and with your finger make an indentation and add at least 8 drops of red food coloring. Turn on mixer and mix until the dough is all red. Wipe out bowl and add the second piece of dough and doing the same but in the indentation add green food coloring, mix until solid green. Add more food coloring if you desire a deeper color. Leave remaining dough as is. Wrap each piece in plastic wrap and refrigerate 30 minutes.
On a piece of parchment paper about 18-inches long place one of the balls of dough. Place a second piece of parchment paper on top of the dough. With a rolling pin roll out dough until flat and about 1/8” thick. Do this with each of the two remaining pieces of dough until you have all three colors rolled out about the same size on parchment paper.
2015.11.30@20.29.56._K3_45542015.11.30@19.55.03._K3_4509Carefully take the red dough and flip on top of the plain dough. Then take the green dough and flip on to the red dough. You should now have all three doughs stacked on top of each other.
Get a knife or pizza cutter and trim the edges so all sides are square. Set scrap pieces aside*. Once it is trimmed turn the dough so the long side is facing you and roll it up. Wrap in a piece of parchment paper folding ends over to keep from drying out. Place in the refrigerator until hard, about 1 hour. Once it is ready unroll from paper and using a sharp knife cut the dough in ¼-inch slices. Next roll the edges in the non- pareils. I found that if the outside dough is too dry they will not stick. Just dip your finger in some water and go around the edge to wet it and then roll into the non-pareils.
2015.11.30@20.20.02._K3_45312015.11.30@20.46.50._K3_4564Place on a baking sheet that has been covered with a silpat or parchment paper. This will give the cookies a nice bottom. Bake in a 350 degree oven for 8 minutes and turn the pan 180 degrees and bake another 2 minutes. The cookies should be light brown on the bottom and no brown on top. You will need to adjust the time to your oven’s temperature. Remove baking sheet from oven and place on wire rack for two minutes. Remove cookies from baking sheet and place on wire rack to cool completely.
*You will have pieces of dough scraps left after trimming. Just mix them up together slightly and roll into log and you can slice like the other cookie but you will have a marbled cookie instead of a swirl.

2015.11.30@21.45.21._K3_4624

Filed Under: baking, cookies, desserts, family favorites · Tagged: baking, Christmas, cookies, green, holiday, red

Best Ever Homemade Pie Crust

November 21, 2015 · by Carrie Trax ·

This is the best pie crust and the only one I make. I have been using this recipe for over 30 years for baking fruit pies, cobblers, mini hand pies, homemade pop tarts, savory chicken pot pies and so much more.  This pie crust has won many blue ribbons and best of shows at my county and state fair.

Best Ever Homemade Pie Crust
3 cups all-purpose flour
1 teaspoon salt
1 1/4 cups shortening
1 egg
5 tablespoons cold water
1 tablespoon apple cider vinegar

In large bowl combine the flour and salt.  Add shortening and with pastry blender combine until the flour mixture resembles small crumbs.  In small bowl combine egg, water and cider vinegar.  Add all at once to the flour mixture and mix until just combined.  Divide dough in half and wrap in plastic wrap, refrigerate 30 minutes.  When ready roll out one piece at a time to fit your pie pan.  Recipe makes enough to do a double crust pie with some extra dough to make decorative cutouts for your pie.

Filed Under: Award winning recipes, baking, desserts, Holidays, pies · Tagged: baking, pie, pie crust

Mini Apple Hand Pies are perfect for the Lunch Box!

November 10, 2015 · by Carrie Trax ·

Apple Hand Pies

Even with the apple crop being so early this year there are still many apple varieties at the farmers markets and in the local grocery store.  Here is a flaky little treat to make and it fits in the palm of your hand, Apple Hand Pies.  Here is a homemade version of the little pies you probably remember you had in your lunch box growing up.  With just a few easy steps these little pies are simple to make and perfect for those small little hands in your family, no fork needed.

Mini Apple Hand Pies2015.11.03@18.55.57._K3_33192015.11.03@18.57.04._K3_33232015.11.03@19.08.55._K3_3355Apple Hand Pies
1 box (14.1 oz) refrigerated pie crust (for two pies) or homemade pie crust
1/2 cup unsalted butter
4 large apples
1/2 teaspoon kosher salt
1/2 teaspoon nutmeg
1/2 cup light brown sugar, packed
2 teaspoons cinnamon
3 tablespoons flour
1 egg white, beaten

Glaze
1 1/4 cup powdered sugar
2 tablespoons milk

Preheat oven to 425F.  Remove pie crusts from package and allow to come to room temperature while you prepare filling or prepare homemade pie crust.
Peel and dice the apples. In a large skillet, melt butter over medium high heat. Add apples, salt, nutmeg, brown sugar and cinnamon. Heat for about 5-10 minutes, until apples are soft, stirring occasionally.
While apples are heating, unroll pie crusts and cut 6-7 circles from each crust (using a 4 inch biscuit cutter). You may have to roll scraps to get the extra circles. Set aside.
After apples have softened, sprinkle in flour. Heat for an additional minute, stirring thoroughly.
Using a 1 tablespoon scoop, drop apple mixture into center of each pie crust circle. Fold in half and pinch edges COMPLETELY. Fold pinch edges over. Apple Hand PiesApple Hand PiesApple Hand PiesPoke hand pie with tines of a fork to prevent bursting.
Beat egg white in a small bowl. Brush over the tops of each pie. Bake on a parchment paper lined baking sheet for 15-20 minutes, until lightly browned.
While pies are baking, whisk together the glaze ingredients. Remove cooked pies from baking sheet and drop in glaze, coating it completely. Return to parchment paper and allow to set, about 10 minutes. Enjoy warm or cold.

Apple Hand Pies

Recipe from ~ Shugarysweets.com


Filed Under: apples, baking, desserts, fruit, lunch, pies · Tagged: apples, dessert, glazed, hand pies, lunch, pie

What to do with all the Green Tomatoes … Fried Green Tomatoes

November 8, 2015 · by Carrie Trax ·

Fried Green TomatoesWhat to do with some of the green tomatoes you picked at the end of season that might still be hanging around your house?  Coated with a crispy cornmeal and panko crumb mix these fried green tomatoes are the perfect treat to serve as a side dish or topped on a burger.

Fried Green Tomatoes
3 fresh green tomatoes, cut into 1/4 inch slices2015.10.03@11.57.36._K3_2625Fried Green TomatoesFried Green Tomatoes
Salt and pepper to taste
1/2 cup all-purpose flour
2 large eggs, beaten with 1 tablespoon water
1/2 cup yellow cornmeal
1/2 cup panko crumbs
1/4 teaspoon paprika
oil for frying

Liberally season green tomato slices with salt and pepper on both sides. Place flour and egg mixture into two separate small bowls.  Combine cornmeal, panko crumbs and paprika into another small bowl and whisk together. Begin by dipping each seasoned tomato slice into flour coating on both sides. Next add floured tomato slice to eggs coating on both sides. Lastly dip into cornmeal and crumb mixture and set aside finished slice on baking sheet. Repeat dredging process, starting with flour, until all slices are coated. Heat oil in a frying pan over medium high heat. Fry tomato slices on both sides until golden brown and drain on paper towels. Serve warm.

Fried green tomatoes stacked on a white plate


Recipe from ~ Grandbaby cakes


Filed Under: appetizer, Fresh From Oregon, lunch, Main Dishes, sandwich, tomatoes, vegetables · Tagged: cornmeal, crispy, dinner, fried, green, lunch, panko, southern, tomatoe

Bays English Muffins Pumpkin Pudding

October 30, 2015 · by Carrie Trax ·

Bays English Muffin Pumpkin Pudding

It’s that time of year where you can find fresh pumpkins everywhere and what a great time to create some pumpkin inspired dishes.  It is easy to cook your own pumpkin in just a few easy steps.  Follow these directions and you will have fresh pumpkin for pie, muffins and more, cooking fresh pumpkin for puree.  I created this pumpkin dish by using Bays English Muffins instead of bread.  The English Muffins are the perfect texture for making this pudding.  Remember to look for Bays English Muffins in your store’s refrigerated section.  All their muffins are made to order, and leave the factory within 24 hours of baking and are shipped across the country in refrigerated trucks.

Bays English Muffin Pumpkin Pudding with Vanilla Sauce
6 Bays English MuffinsBays English MuffinBays English Muffin Pumpkin PuddingBays English Muffin Pumpkin Pudding
2 eggs, beaten
1/2 cup sugar
2 cups milk
1/2 teaspoon vanilla extract
1 cup fresh pumpkin puree or canned
1/2 cup dried cranberries
1/4 cup pecans, chopped

Cut each Bays English Muffin into 9 pieces and place in large bowl, set aside.  In medium bowl beat eggs, sugar, milk, vanilla and pumpkin puree. Pour pumpkin mixture over Bays English Muffin pieces and stir in the dried cranberries, let set for 1 hour. You can also pour directly into the baking dish, cover, refrigerate and bake the next day.  Spray a 12-inch or 13×9 baking dish.  I used a pretty decorative ceramic pie plate.  Pour mixture into baking pan and place on a baking sheet and then add about 2 cups of water to the baking sheet.  Bake at 350 degrees for 1 hour or until golden brown and knife inserted comes out clean. Remove and cool for about 10 minutes if you would like to serve warm. Drizzle with the warm vanilla sauce and sprinkle with the pecans and serve.  Once cooled completely you can refrigerate to serve later or the next day.

Vanilla Sauce
1 cup milk
2 tablespoons butter
1/3 cup sugar
1 teaspoon vanilla extract
1 tablespoon flour
1/8 teaspoon salt

Mix everything together and bring to boil for 3-4 minutes, stirring constantly. Set aside for 5 minutes, then pour on warm bread pudding

Bays English Muffin Pumpkin Pudding


Filed Under: baking, bread, breakfast, desserts, favorite products, Holidays, Thanksgiving · Tagged: Bays English Muffin, dessert, dried cranberries, pumpkin, spices, Thanksgiving, vanilla sauce

Stonyfield Yogurt… Good Morning Parfait

October 22, 2015 · by Carrie Trax ·

2015.10.18@15.50.34._K3I5238Yogurt is one of my favorite morning meals.  I have enjoyed it with just a spoon right out of the container, with fresh fruit or topped with homemade granola.  This morning I decided to make a parfait with fresh strawberries and my Homemade Baked Oatmeal.  Inspired by Stonyfield Yogurt who sponsored breakfast at the International Food Blogger Conference in Seattle last month.  At the conference we started off our first morning bright and early with a breakfast bar sponsored by Stonyfield Yogurt.   Pineapple Banana Smoothie and a Mixed Berry Smoothie Bowl, both made using Stonyfield Organic Greek Yogurt were two of the morning treats we enjoyed.  But the most unique parfait at the breakfast bar was in a Martina glass, a savory dish with beets, citrus and dill on top of Stonyfield Organic Greek Yogurt.  So simple just layer some Stonyfield Organic Greek plain yogurt in the bottom of a glass and top with some shredded beets, fresh orange segments and a sprig of dill.  Here is my Stonyfield inspired parfait in one of my glass canning jars.

Good Morning Parfait ~ Makes one parfait2015.10.18@15.51.50._K3I5242
5.3 oz container of your favorite Stonyfield Organic Greek Yogurt
4 strawberries, cleaned and sliced
1/2 cup Baked Oatmeal*

Start by layering 1/4 cup of Baked Oatmeal in the bottom of a 1/2 pint glass canning jar.  Add 1/2 of the Stonyfield Greek Yogurt and 3 of the sliced strawberries.  Spoon in the remaining Baked Oatmeal and yogurt.  Top with the last sliced strawberry.  Get a spoon and enjoy.  These would be great for a family brunch and you can make them earlier in the day!

*I like making a batch of the Baked Oatmeal and placing in small freezer containers to pull out whenever I am ready to make these parfaits or just to enjoy with fresh strawberries and milk.

2015.10.18@15.52.22._K3I5247

2015.10.18@15.49.00._K3I5235

Filed Under: baking, berries, breakfast, desserts, snack · Tagged: baked oatmeal, breakfast, strawberries, yogurt

Bays English Muffins perfect for your Lunch Box!

October 18, 2015 · by Carrie Trax ·

Sandwiches with Bays English Muffins

Last month I was in Seattle for the 2015 International Food Blogger Convention where I got to network with other amazing food bloggers.  I also had the opportunity to meet many companies in the food industry.  One of the companies I had the pleasure of talking to was Bays English Muffins.  I had the chance to talk to and watch George Bay, grandson and namesake of the family run business create some amazing sandwiches with Bays English Muffins.  As I was watching George make a few sandwiches piled high with some savory ingredients I thought Bays English Muffins are not just a breakfast item but would make a great sandwich for anytime of the day.  Thanks to Bays English Muffins I went home with some free packages of English Muffins ready to create my own sandwich combinations.  The first thing I noticed when I opened the packages was how soft and fresh they felt.  Bays maintains its standard of excellence by using only Hawaiian cane sugar, Minnesota spring wheat and whole milk, Wisconsin AA butter, and potato flour.  This is why you will need to look in the refrigerated dairy case of your grocery store for them.  All their muffins are made to order, and leave the factory within 24 hours of their baking and are shipped across the country in refrigerated trucks. Check out the quick and easy sandwiches I created with my Bays English Muffins.

Cuban English Muffin SandwichCuban sandwich on Bays English muffin
1 Bays English Muffin, lightly toasted
2 thick slices ham
2 slices Swiss cheese
1 dill pickle, sliced
Yellow mustard
Butter

On the inside of each Bays English Muffin spread a thin layer of yellow mustard and top each side with a piece of Swiss cheese.  On one Bays English Muffin side place the ham and on the other side place the sliced pickles. Put the two sides together and brush the outside of each Bays English Muffin with butter.  Place on a hot flat top grill or in a hot skillet over medium heat.  Cook each side until golden brown and the cheese is melted.  Remove from heat and it is ready to eat.

Bays Englisg Muffin with swiss cheese, ham and picklesBays English Muffin with mustard


Hawaiian English Muffin SandwichHawaiian sandwich with ham and pineapple on Bays English muffin
1 Bays English Muffin, lightly toasted
2 thick slices ham
2 slices Swiss cheese
2 thin slices grilled peppered pineapple*
1 tablespoons cream cheese
Butter

On the inside of each Bays English Muffin spread the cream cheese.  On one Bays English Muffin side place the ham and on the other side place the grilled peppered pineapple. Put the two sides together and brush the outside of each Bays English Muffin with butter.  Place on a hot flat top grill or in a hot skillet over medium heat.  Cook each side until golden brown.  Remove and it is ready to eat.

* To prepare pineapple coat two thinly sliced pineapple pieces with olive oil and sprinkle with coarse black pepper.  In a lightly buttered saute pan grill each side of the pineapple until lightly brown.  Should only take a few minutes.
Bays Englis Muffin with cream cheeseBays English Muffin with creamcheese, ham and grilled peppered pineapple


Monte Cristo English Muffin SandwichMonte Cristo sandwich on Bays English Muffin
1 Bays English Muffin, lightly toasted
1 thick slice ham
2 slices turkey
2 slices Swiss cheese
2 teaspoons strawberry jam
1 egg
1 tablespoon milk
1 tablespoon butter
Powdered sugar

On the inside of each Bays English Muffin side spread 1 teaspoon of strawberry jam and a piece of Swiss cheese.  On one Bays English Muffin side place the ham and on the other side place the sliced turkey. Put the two sides together, set aside.  In small bowl beat the egg and milk.  Add butter to a hot flat top grill or in a hot skillet over medium heat.  Dip sandwich into the egg mixture making sure to dip both sides.  Cook each side until golden brown and the cheese is melted.  Remove from heat and sprinkle with powdered sugar.

Tip: You can wrap in a piece of foil to keep sandwiches warm if making several sandwiches.

Bays English Muffin with strawberry jamBays English Muffin with strawberry jam and swiss cheeseBays English Muffin with strawberry jam, swiss cheese, turkey and hamBays English Muffin with strawberry jam, swiss cheese, turkey and ham with egg mixture for french toast


Filed Under: bread, lunch, Main Dishes, sandwich · Tagged: Bays English Muffin, Cuban, English muffins, ham, lunch, Monte Cristo, pickles, pineapple, Sandwich, strawberry jam, Swiss cheese, Turkey

Dutch Apple Pie ~ Just the right bite!

September 15, 2015 · by Carrie Trax ·

Crumb top dutch Apple Pie

The apples here in Oregon are 2-3 weeks early this year which means 2-3 more weeks of fresh apple pies in my house.  Some of my favorite apples that are ready now are Jonagold and Honeycrisp, both these apples make a great apple pie, especially a Dutch Apple Pie!  To make the recipe below you will need to get 4-5 medium apples but looking at this years crop they are so much bigger 4 apples might do the job.  So what is this Dutch apple pie?  It is an apple pie with a traditional dough bottom crust but topped with a crumb topping of oats and cinnamon.  I added some extra flavor to my topping and used one of Bob’s Red Mill NEW Oatmeal cups in my topping.  One oatmeal cup contains the perfect amount I needed for my topping.  The Oatmeal cup I used also has maple added giving these pies an extra layer of flavor and the addition of flax and chia seeds makes it even more nutritious and filling.  Check your local market for these new cups available in 4 flavors or order online direct from Bob’s Red Mill.

Dutch Apple Pie
Topping:
1 cup Bob’s Red Mill all-purpose flour
1/4 cup packed brown sugar
1 Bob’s Red Mill GF Brown Sugar and Maple Oatmeal cup
1/4 teaspoon cinnamon
8 tablespoons butter, melted

Filling:
2/3 cup sugar
3 tablespoons cornstarch
1-1/4 cups cold water
5 cups apples, diced & peeled
1 teaspoon vanilla extract

Pie crust, 1/2 recipe needed, (make the full recipe and place extra half in freezer to use later)
8 – 1/2 pint wide mouth canning jars or 4 mini pie plates or 1 – 9-inch pie plate

Prepare pie crust and refrigerate for 30 minutes.
In a large bowl, combine the flour, brown sugar, Bob’s Red Mill GF Brown Sugar and Maple Oatmeal cup and butter; set aside.

For filling, combine the sugar, cornstarch and water in a large saucepan until smooth; bring to a boil. Cook and stir for 2 minutes or until thickened. Remove from the heat; stir in apples and vanilla. 

To assemble spray each glass jar lightly with cooking spray.  Take the pie crust (you only need half of the full recipe) and divide into 8 equal pieces.  Roll each piece into about a 6-inch circle.  Place each piece into the prepared glass canning jar and press into the sides and bottom of the jars up to the top edge of each jar.  If you want to make one big pie just roll the dough out to fit an 9-inch pie plate.  Spoon apple pie filling into each crust; top with the crumb topping mixture. Bake at 350° for 1 hour. At 30-45 minutes check to see if the topping is brown if so, lightly lay a piece of foil over the top of the pies the last 15-30 minutes. Cool on a wire rack. Yield: 8 servings.

Jonagold apples


Save

Save

Save

Save

Filed Under: apples, baking, desserts, farmers market, favorite products, Fresh From Oregon, fruit, Oregon made products, pies · Tagged: apples, baking, Bob's Red Mill, fruit, oats, pie

Corn Relish … Summer in a Jar

September 9, 2015 · by Carrie Trax ·

Corn RelishIt’s not too late to have that fresh taste of summer preserved for winter.  Corn is still in season and combined with peppers, onions and celery it makes the perfect relish.  Served over some grilled chicken, steak or added to cooked rice, the flavors will make any dish have that fresh taste of summer.  This is also great as a side dish served cold or hot.  I like to enjoy this relish throughout the winter so I preserve some jars when the corn is fresh. During the cold winter months I can open up a jar and have that fresh taste of  summer.2015.08.09@08.20.55._K3_0507

When making the corn relish I used my new Crisp™ Corn Stripper.  WOW did this work fast and easy getting all the corn off the cob.  The extra sharp curved blade that conforms to the shape of the corn cob quickly separated the kernels.  It is a 2 in 1 tool with the addition of the DESILKER. The sturdy nylon bristles gently remove dirt and stray silk strands leftover from husking the corn. Check out the pictures below to see how it takes off all the corn in less than 15 seconds.

Corn Relish
16-20 ears of fresh sweet corn (8 cups)2015.08.09@09.09.37._K3_05162015.08.09@09.13.09._K3_05392015.08.09@09.15.13._K3_05562015.08.09@09.17.44._K3_0564
2 cups water
3 cups of celery (6 stalks)
1 1/2 cups chopped red sweet pepper
1 cup chopped onion (2 medium)
2 1/2 cups vinegar
1 3/4 cups sugar
4 teaspoons dry mustard
2 teaspoons pickling salt
1 teaspoon celery seeds
1 teaspoon ground turmeric
3 tablespoons cornstarch

Shuck the corn and make sure you get all the silk off the ears.  Cut the corn off the cobs, but do not scrape the cobs.  Measure 8 cups of corn and put them in a sauce pan with 2 cups of water.  Bring to a boil; reduce heat and simmer, cover for 5 minutes or until the corn is almost tender.  Drain the water off.

In the same pot, combine the cooked corn, celery, peppers and onion.  Stir in vinegar, sugar, mustard, pickling salt, celery seeds and turmeric.  Bring to a boil and let simmer for 5 minutes, stirring occasionally.  Stir together cornstarch with 2 tablespoons water; add to corn mixture.  Cook, stirring until slightly thickened and bubbly; cook and stir 2 minutes more.  The mixture will start to thicken.

This will yield about 5 pints of corn relish.  You can place in jars and refrigerate to use later or if you want a longer shelf life see the following directions.
Prepare 5 pint jars by sterilizing them.  Ladle the hot relish into jars.  Leave a half inch of head space.  Wipe the jar rims with a clean towel and top with lids and bands.  Process filled jars in a boiling-water canner for 15 minutes. Start timing when the water returns to a boil.  Remove jars; cool on wire racks and then store in a cool, dark place.   Refrigerate after opening.

Recipe ~ Better Homes & Garden

Jars corn relish and in a bowl


Filed Under: canning, farmers market, Fresh From Oregon, side dish, Thanksgiving, vegetables · Tagged: Canning, corn, relish, summer

  • « Previous Page
  • 1
  • 2
  • 3
  • 4
  • 5
  • …
  • 15
  • Next Page »

Fresh From Oregon!

Welcome to Fresh From Oregon! Read More…

Subscribe to Blog via Email

Enter your email address to subscribe to this blog and receive notifications of new posts by email.

Join 37 other subscribers

Connect With Me

  • Email
  • Facebook
  • Flickr
  • Google+
  • Instagram
  • Pinterest
  • Twitter

Featured Posts

Lemon Poppy Seed Bread Pudding

Lemon Poppy Seed Bread Pudding

Here is my second bread pudding recipe for my 2015 bread pudding mission.  This bread pudding is layered with a lemony cream and sprinkles of poppy-seed. If you think this is not enough lemon wait until you pour some warm lemon sauce over the top.  A burst of lemon flavor is in every bite! Lemon […]

Strawberry Rhubarb Sauce

Strawberry Rhubarb Sauce

This year in Oregon we have had an early spring and the fresh strawberries and rhubarb are already starting to be harvested.  These two make the best combination for pies, cobbler and YES a sweet sauce.  In about 30 minutes I had a warm sweet sauce ready to serve on my homemade buttermilk pancakes! Strawberry […]

Summer Pickled Vegetables

Summer Pickled Vegetables

If you have a garden or go to a local farmers market you will see an abundance of vegetables at this time of the year.  Making pickled vegetables is a great way to preserve that summer taste so you can enjoy it all winter long.  A jar of pickled vegetables makes a great gift during the […]

The BEST Homemade Granola

The BEST Homemade Granola

Once you have made and tasted homemade granola you will never buy store bought again.  This is the BEST homemade granola recipe and so easy to make.  The basic granola recipe combines quick rolled oats, coconut and wheat germ.  You then add your favorite nuts and dried fruit, a honey mixture, toss and bake for […]

Recent Posts

  • Washington Asparagus Fresh at your local Market Now!
  • Asparagus Salad with Lemon Vinaigrette
  • Fresh from Oregon heads to California
  • Summer Corn & Crab Chowder
  • Fresh Asparagus with Eggs Benedict
  • The Best Way to Store Asparagus
  • Roasted Asparagus with Lemon Olive Oil
  • Spring in Finally here in Oregon
  • Simply Natural ~ Lindsay Olives
  • Capay Valley Ranches ~ California Olive Oil at its Best!
  • Over the Top Blueberry Muffins
  • Fresh Homemade Blueberry Sauce
  • The BEST Homemade Granola
  • Homemade Strawberry Lemon Jam
  • Strawberry Cheesecake in a Jar
  • Homemade Strawberry Sauce
  • Asparagus Caesar Salad
  • Fresh from the Oregon Coast ~ Cioppino for Two!
  • Pancake Hearts for Breakfast
  • Homemade Chicken Noodle Soup
  • Apricot Coffee Cake with Crumb Topping
  • The Great Food Blogger Cookie Swap 2015 ~ Christmas Swirl Sugar Cookies
  • Best Ever Homemade Pie Crust
  • Mini Apple Hand Pies are perfect for the Lunch Box!
  • What to do with all the Green Tomatoes … Fried Green Tomatoes
  • Bays English Muffins Pumpkin Pudding
  • Stonyfield Yogurt… Good Morning Parfait
  • Bays English Muffins perfect for your Lunch Box!
  • Dutch Apple Pie ~ Just the right bite!
  • Corn Relish … Summer in a Jar
  • Mixed Berry Bread Pudding
  • Fresh Oregon Berry Tart
  • The Hoods are here… Mini Strawberry Pretzel Pie
  • Strawberry Rhubarb Sauce
  • B “S” T Egg Salad Sandwich
  • Melt in your Mouth Reuben Sandwich

Archives

Meta

  • Log in
  • Entries feed
  • Comments feed
  • WordPress.org

Experience fresh food from Oregon!

Recipe Master: Carrie Trax Editor: John Trax
Photographer: John Trax

Categories

Copyright 2014 Fresh From Oregon

Copyright © 2025 | Innovative by The Pixelista | Built on the Genesis Framework